It can be bothersome when you're trying to turn on your computer to get work done or play games with your friends, but it won't boot. Users often encounter the scenario that Windows 10 does not boot after upgrading the operating system or other operations. Continue reading this article from EaseUS, and you will learn how to do Windows 10 boot repair.
You can frequently see Windows users complain on forums that their Windows 10 computers have trouble booting up as usual. It could be a blue screen, a black screen, or a message of a boot failure error and incorrect loading. The causes of such problems can be mainly classified into three categories:
Different scenarios require different methods to repair the boot issues. Here, we provide you with 11 ways to help you out. Each method resolves the issue in different ways, so choose the most appropriate one for you. Read on to learn more.
Bootrec.exe is designed to repair common corrupted items like the master boot record, boot configuration data store (BCD), and the boot sector. If find your Windows unable to boot up, you can try bootrec.exe to update the master boot record and boot sector code to fix it. To use repair boot codes, you should open the Command Prompt first and run a few commands.
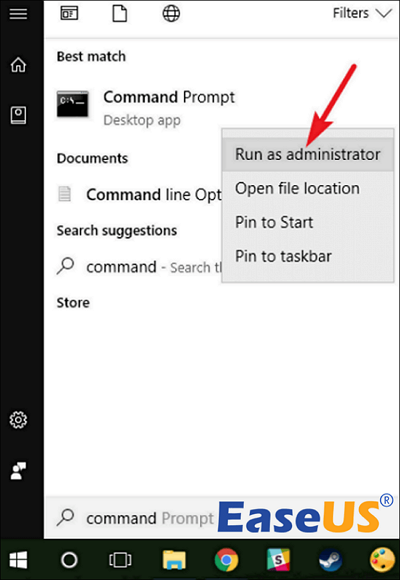
Step 1. Press the "Windows + S" to open the search box. Then, type cmd or command prompt into it, right-click "Command Prompt", and select "Run as administrator".
Step 2. Type in bootrec /fixmbr and hit "Enter" to repair boot codes. It can fix corrupted MBR or any unidentified MBR issues.
Step 3. Type in bootrec /fixboot and hit "Enter" to repair a corrupt boot sector.
Restart the computer and see if it works normally.
If the BCD file is missing or corrupted, your Windows 10 usually becomes unbootable. You might see a blue screen with a message showing "Error code: 0xc0000098" or "Error code: 0xc0000034" when you turn on your computer.
You can download professional software like EaseUS Partition Master Professional to fix the startup issue if your Windows 10 PC cannot boot up because of BCD-related errors. This powerful tool provides a Boot Repair feature that can help you fix and rebuild BCD directly. It is easier and faster and has multiple systems supported, which is quite convenient, unlike using commands.
Follow the steps below to fix the problem with just a few clicks.
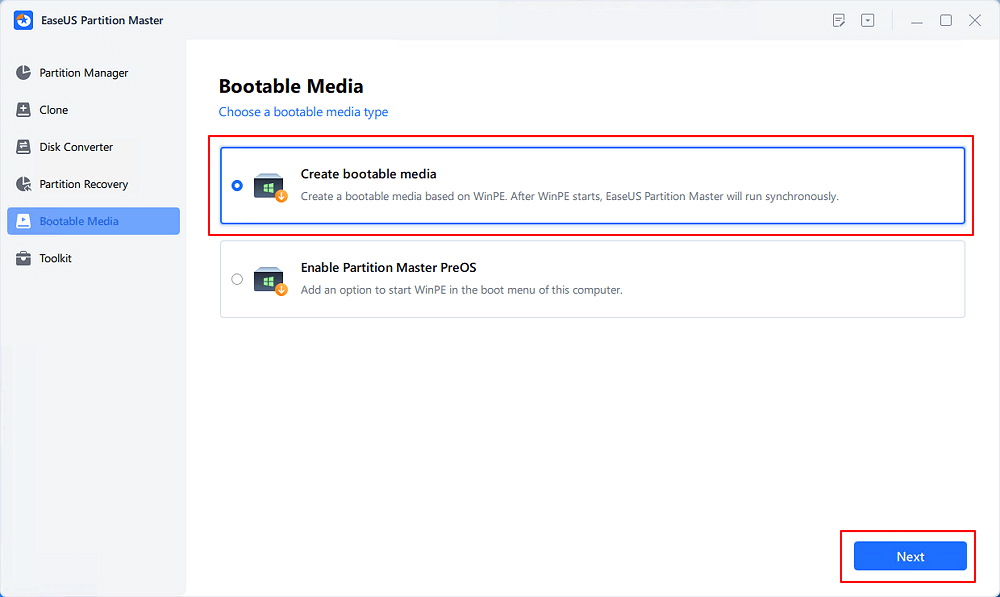
Step 1. Connect the external drive/USB to your computer and run EaseUS Partition Master. Then, go to "Bootable Media" and select "Create bootable media".
Step 2. Select an available USB Drive or CD/DVD and click "Create." You can also burn the Windows ISO file to the storage media.
Step 3. Connect the created bootable drive to the new computer and reboot the computer by pressing and holding F2/Del to enter the BIOS. Then, set the WinPE bootable drive as the boot disk and press F10 to exit.
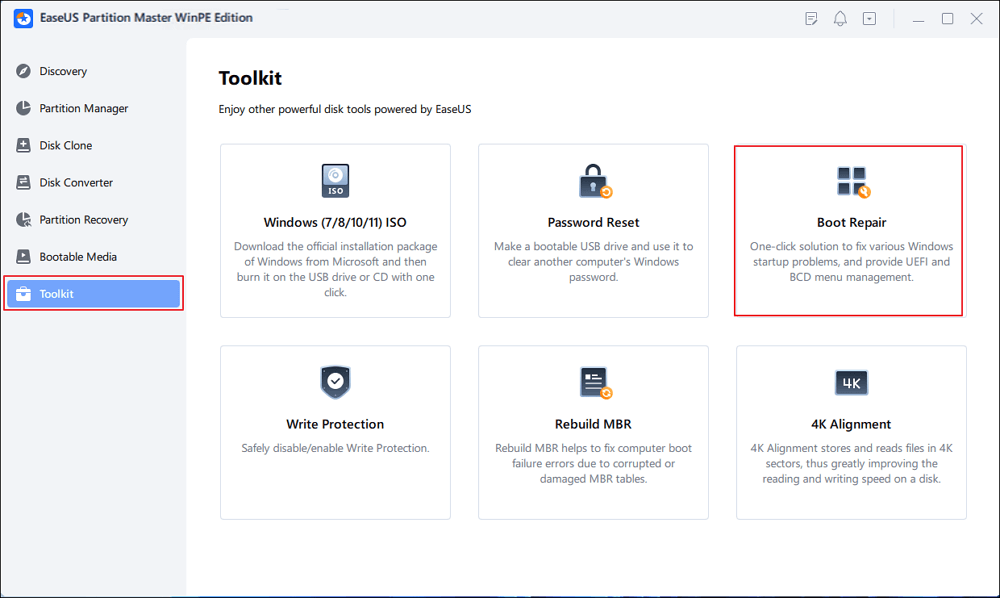
Step 4. Boot the computer again and enter the WinPE interface. Then, open EaseUS Partition Master and click "Boot Repair" under the "Toolkit" option.
Step 5: Select the system you want to repair and click "Repair."
Step 6. A message showing that the system has been successfully repaired will appear. Click "OK" to complete.
After the boot repair process, you should modify the boot order to the original drive. Then, boot up your Windows 10, type in passwords if you have one, and see if you can get into the system as usual.
If your computer has trouble booting up because of incorrect, changed, corrupted, or damaged system files, SFC (System File Checker) can replace them with the cached version of the files. The SFC Scan command can automatically recognize and modify the system files and settings, including DLL files, to deal with the issue.
You can use SFC to repair missing or corrupted system files with a known valid version.
Step 1. Turn on your PC and tap "F11". You will access the Advanced Startup.
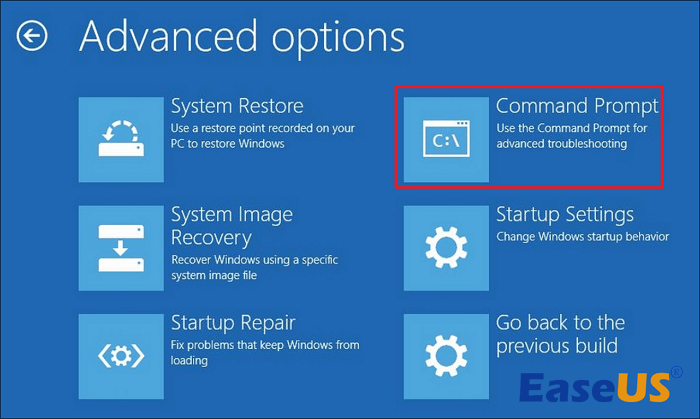
Step 2. Select "Troubleshoot > Advanced options > Command Prompt".
Step 3. Type the command and press "Enter":
sfc /scannow /offbootdir=c:\ /offwindir=c:\windows
If you cannot boot up your computer due to a corrupted file system, you should turn to the CHKDSK command. It can resolve logical disk errors and physical disk errors. CHKDSK allows you to examine and repair most hard drive problems. The instructions for using the CHKDSK command to check and repair disk problems are given below.
Step 1. Open Command Prompt from Windows recovery mode.
Step 2. Type chkdsk c: /f /r in the command prompt and hit "Enter".
Step 4. Check the C drive where the user's startup folders are usually located.
Now, restart your PC and see if the problem is resolved.
If you have hard drive issues or other hardware problems that prevent you from booting normally, this tool can be especially useful. The Startup Repair tool examines and repairs startup files, the Windows boot manager, faulty system files, missing drivers, dual-boot configurations, incorrectly configured settings, etc.
It can also generate logs of its outcomes, which might be helpful in troubleshooting Windows startup failure issues.
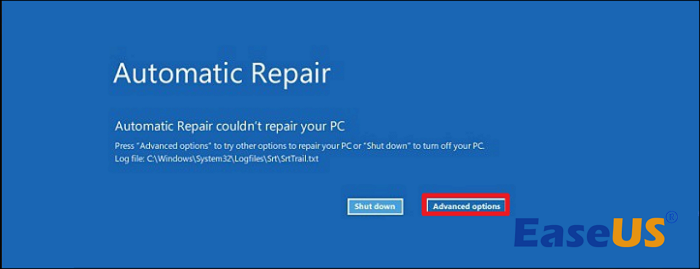
Step 1. Access the Recovery Environment. Turn on your computer and then turn it off when you see the Windows logo. Repeat this operation three times. After the third time, your computer will boot into diagnostics mode.
Step 2. Click on "Advanced options" on the screen.
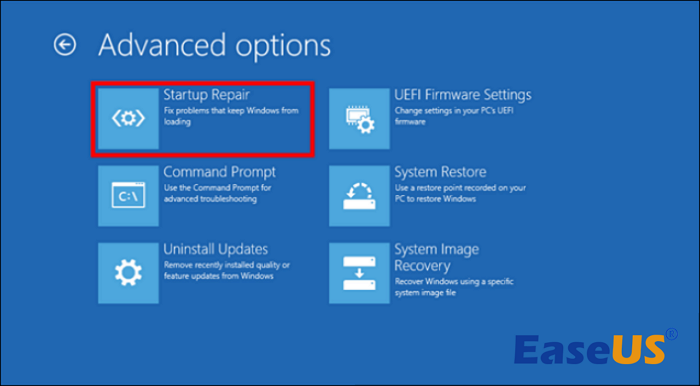
Step 3. Click on "Troubleshoot > Advanced options > Startup Repair".
Step 4. Wait for the process to complete.
Reboot your computer and see if it works.
If your BIOS configuration is wrong, you may not be able to boot your Windows 10 computer. You can try the method below and see if it resolves your problem.
Step 1. Restart your computer.
Step 2. Hold down a specific key, such as "F1, F2, F10, Esc, and Delete", or key combinations like "Ctrl + Alt + Delete" or "Ctrl + Alt + Esc" when you see the computer manufacturer logo.
(The key or keys differ based on the model and manufacturer of your computer and motherboard.)
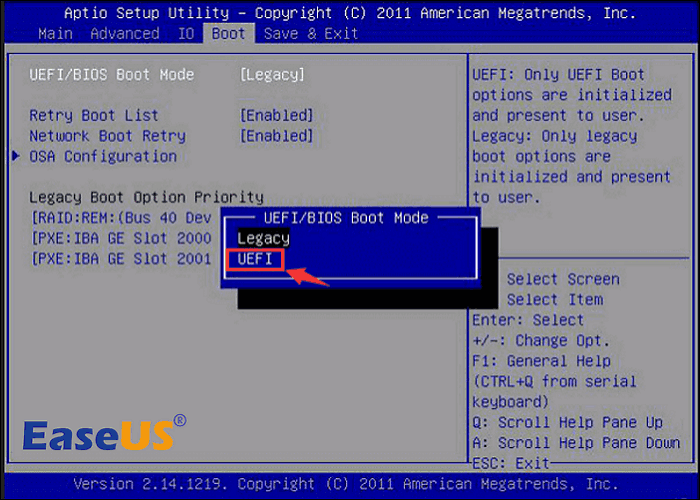
Step 3. Use the arrow keys to navigate to the "Boot" page.
Step 4: Modify the "UEFI/BIOS Boot Mode" according to your disk partition style. Then, press "Enter".
The boot mode must match the type of disk that you installed. When booting an MBR system drive, you should select Legacy support rather than UEFI. If your system drive is GPT, you should select UEFI. This will help you fix the BIOS misconfiguration errors and boot up your Windows 10 properly.
Step 5. Navigate to the "Save & Exit" page and press "Enter".
Boot your computer again. Check if it is normal now.
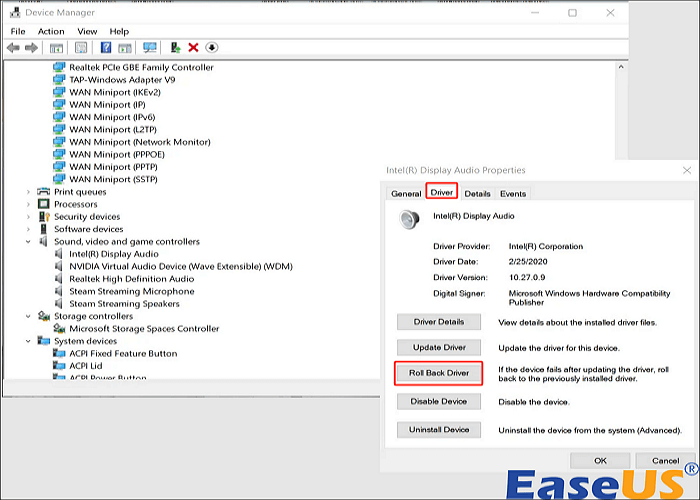
Outdated or faulty drivers might cause Windows 10 to fail to boot. If your computer could not boot after a recent driver update, remove the new driver version.
Step 1. Press "Win + X" and open Device Manager.
Step 2. Find the device for which you've recently updated the driver.
Step 3. Right-click the device, select "Properties", and navigate to the "Driver" tab.
Step 4. Select "Roll back driver".
After the process, restart your computer and see if it works.
If you have installed an update that is corrupt or buggy recently, Windows 10 will have trouble booting up. Uninstall the Windows update and see if your computer comes back to normal.
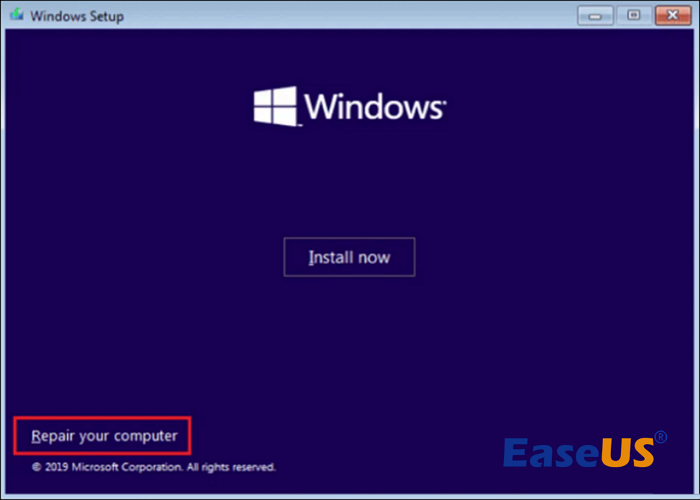
Step 1. Use Windows 10 installation media to start your PC.
Step 2. After getting into the Windows Setup screen, select the language, time, and keyboard or input method and hit "Next".
Step 3. Click "Repair your computer" on the screen.
Step 4. Click on "Troubleshoot" at the advanced startup screen.
Step 5. Next, uninstall Windows 10 updates through Uninstall Updates or Command Prompt.
Option 1. Uninstall Updates: you can choose "Uninstall the most recent quality update" or "Uninstall the most recent feature update".
Option 2. The Command Prompt: You need to uninstall the updates installed on your computer on a specific date by following the steps below.
Step 1. You should check the partition's drive letter where Windows 10 is installed (usually C drive).
Step 2. Type in dism /Image:C:\ /get-packages /format:list to display a list of all updates currently installed on your computer. (You can replace C with your own system drive letter.)
Step 3. Type in the command to delete the unwanted update package:
dism /Image:C:\ /Remove-Package /PackageName:Package_Identity
After this, reboot your PC and see if the issue is fixed.
If you are experiencing issues like a blue screen or cycle start after restoring an older XP system, it may be useful to switch to IDE mode.
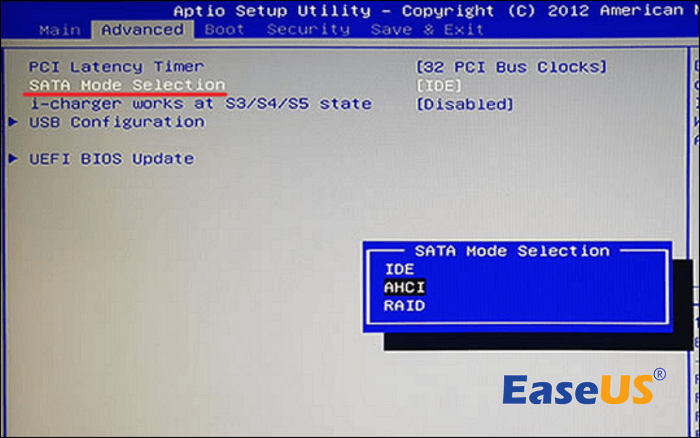
If there are boot problems after upgrading from an HDD to a new SSD, you should check the BIOS settings. Make sure it is set to boot for AHCI.
Step 1. Turn on your computer and tap "F11". You will access the Advanced Startup screen.
Step 2. Select "Troubleshoot > Advanced options > Command Prompt".
Step 3. Type the command and press "Enter": bcdedit /set {current} safeboot minimal (ALT: bcdedit /set safeboot minimal)
Step 4. Restart the computer and press the specific key(s) to enter BIOS Setup. (Search online to find the key or keys for your computer.)
Step 5. Change the SATA Mode to AHCI from either RAID or IDE.
Step 6. Save the changes and exit, and Windows will automatically boot to Safe Mode.
Step 7. Right-click "Start" again. Run Command Prompt as administrator.
Step 8. Type the command and press "Enter": bcdedit /deletevalue {current} safeboot (ALT: bcdedit /deletevalue safeboot)
Step 9. Reboot again, and your Windows will start with AHCI drivers enabled automatically.
(Add the appropriate RAID driver to the cloned system if it is set to RAID mode.)
If your PC is unable to complete the startup process due to certain errors with MBR, drivers, or your hard disk, you might get a "UEFI Boot Error". Try this method to fix the problem.
Step 1. Enter the Command prompt from advanced options.
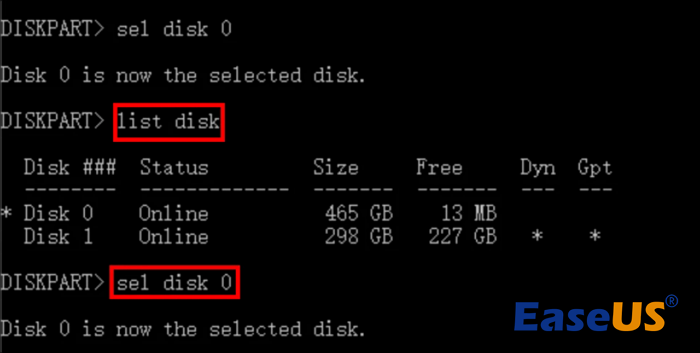
Step 2. Type in diskpart in Command Prompt and hit "Enter".
Step 3. Type list disk and hit "Enter".
Step 4. Type sel disk 0 and hit "Enter" to select disk 0.
Step 5. Type in list vol and hit "Enter" when you see the message "Disk 0 is now the selected disk".
Step 6. Find the UEFI volume from the displayed list (usually Volume 2).
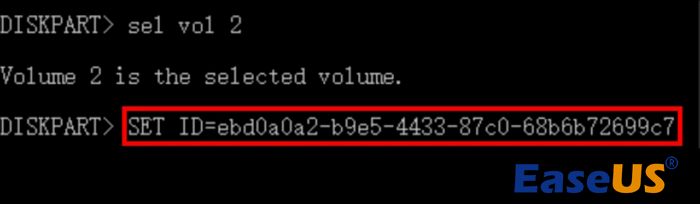
Step 7. Type sel vol 2 and hit "Enter" to select the UEFI volume.
Step 8. Type set id=c12a7328-f81f-11d2-ba4b-00a0c93ec93b or SET ID=ebd0a0a2-b9e5-4433-87c0-68b6b72699c7 and then hit "Enter" to set the volume ID.
Step 9. Type assign letter=G: to assign a drive letter to the partition. (G should be a letter that has not already been used.)
Step 10. Run Command Prompt as an administrator, and then type cd /d G:\EFI\Microsoft\Boot (G is the drive letter you assigned to the UEFI partition. Replace it with your UEFI partition letter).
Step 11. Type bootrec /fixboot and hit "Enter" to repair the boot record.
Step 12. After the repair process is complete, type exit.
Step 13. Type ren BCD BCD.old and bcdboot C:\Windows /1 en-us /s G: /f ALL to rebuild the BCD store. (c:\ is the drive where your Windows 10 is installed).
Step 14. Type exit when the process is complete, and then restart your computer.
Your UEFI boot should be fixed now. Go and boot up Windows 10 on your computer again.
Patching a Windows update or installing a new driver might be the reason why Windows 10 fails to boot. You can use CMD to restore your Windows 10 system to an earlier version. However, documents, emails, music, or personal files cannot be recovered in this way.
Step 1. Tap "F11" when turning on your computer. You will access the Advanced Startup screen.
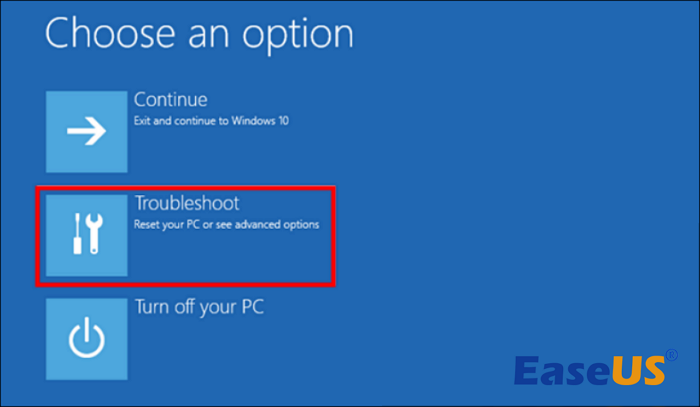
Step 2. Choose "Troubleshoot".
Step 3. Select "Advanced options > See more recovery options > Startup Settings > Restart". Then, hit "6" or "F6" to boot into the safe mode with CMD.
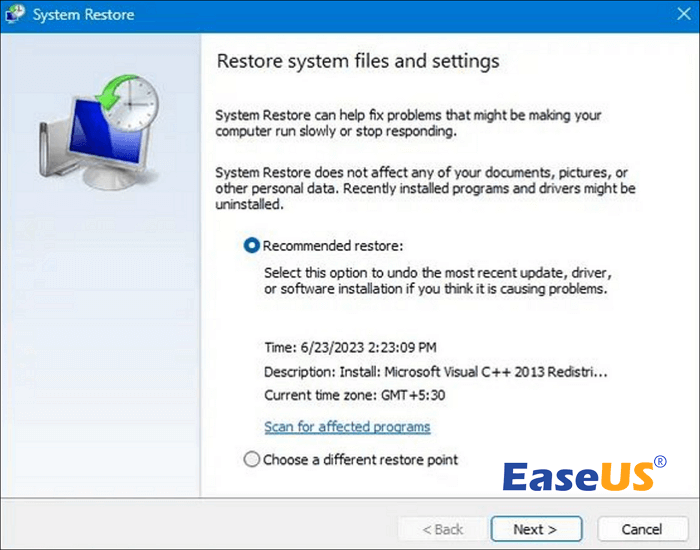
Step 4. Open CMD as an administrator. Type rstrui.exe and hit "Enter".
Step 5. Then, you will see the restore point settings. You can choose "Recommended restore" or "Choose a different restore point". Then, follow the onscreen guide to finish the rest steps.
(The system creates a restore point once a week by default. Or, you can create a restore point manually.)
If you have tried many methods but the computer is still unbootable, use Reset this PC to reset Windows 10. It should be noted that this method will erase all the data on your computer, so make sure you back up the significant files.
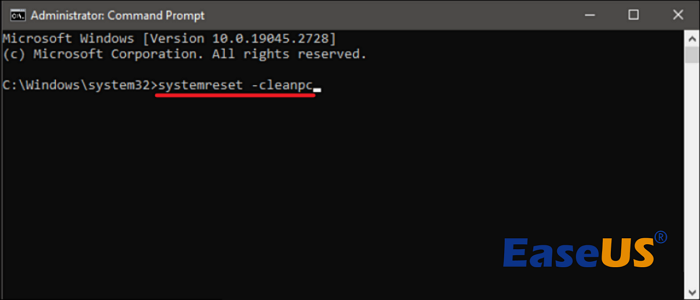
Step 1. Open an elevated command prompt.
Step 2. Type in systemreset -cleanpc and hit "Enter".
Then, restart the computer. It should be able to boot up now.
Having trouble starting up your Windows 10 computer is really exasperating. With all the methods provided above, you can choose a method that is suitable for your current computer condition to fix the problem. Hope you have learned how to do Windows 10 boot repair.
Windows 10 has troubleshooters to help you solve problems on the computer. To run a troubleshooter, select "Start > Settings > Update & Security > Troubleshoot", and then you can do the repair process.
If you are using a laptop, check your battery and see if it has enough power to boot. This can also happen if your computer is linked to an incompatible power source or a faulty surge protector. Invalid hardware can also cause your Windows 10 to fail to boot.
Windows Startup Repair will not delete your files, and it only performs action on system files. However, if you have significant information on the PC, you should back them up on another device.