A New Bootable USB Solution
Many users have upgraded their Windows operating system since the release of Windows 11. However, there are voices complaining that their computer is unable to boot into Windows 11 after the upgrade. Some users say that the computer is stuck on the loading screen and is not able to do anything. Now, read this article from EaseUS to execute Windows 11 boot repair.
Such problems have been reported on both desktops and laptops. Below are the several possible causes of the issue:
Now that you know the possible causes of Windows 11 booting errors, continue reading to find out how to fix the errors in terms of different causes.
To resolve the Windows 11 won't boot issues, we provide 12 solutions for you. Each solution can fix different certain errors that might be able to help your computer get back to normal state. Here is the list of these solutions. The order of these solutions are organized by the difficulty level.
When encountering a Windows 11 startup problem, it is common to first consider using Windows Startup Repair to fix it. If it doesn't work, try rebuilding BCD and MBR. These solutions are the easiest and quite efficient for the issue. Now read on to learn the details.
When a startup problem is detected by the computer, the Startup Repair tool will diagnose any known common problems. It can analyze startup log files automatically. Issues caused by faulty system files or incorrectly configured settings can be scanned and fixed by it.
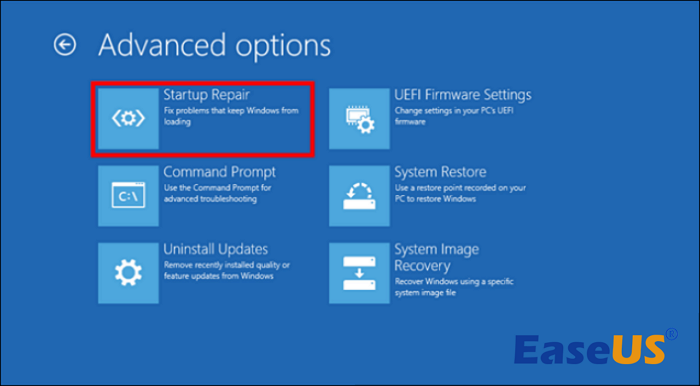
Step 1. Access the Windows Recovery Environment. Press "F11" when your computer is booting up. (The key may differ due to different motherboard manufacturers.)
Step 2. Click "Troubleshoot > Advanced options > Startup Repair".
Step 3. Then, follow the instructions on the screen to execute a Startup Repair procedure.
After the procedure is complete, restart your computer to verify if the problem has been resolved.
If you receive a boot error code while booting up the system, it is probably caused by issues like power outages, disk write errors, boot sector viruses, or errors created during manually configuring the BCD.
A powerful tool like EaseUS Partition Master Pro can fix it easily. This software can repair most issues that are related to BCD errors. Compared to using complex commands, the software offers you an easier and faster feature - Boot Repair. This feature can rebuild BCD directly. It also supports multiple systems.
Now follow the guide below to rebuild the BCD.
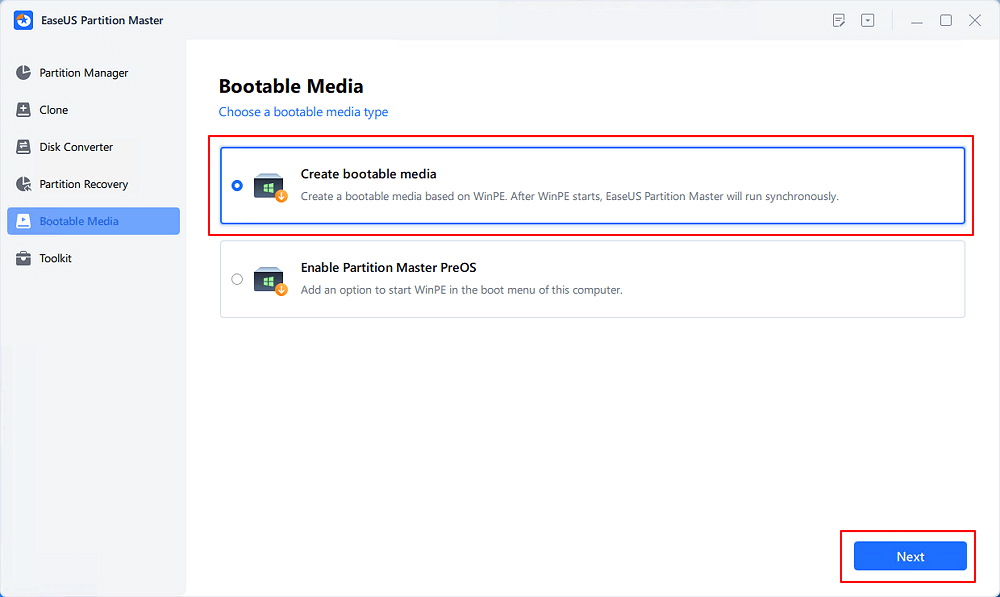
Step 1. Connect the external drive/USB to your computer and run EaseUS Partition Master. Then, go to "Bootable Media" and select "Create bootable media".
Step 2. Select an available USB Drive or CD/DVD and click "Create." You can also burn the Windows ISO file to the storage media.
Step 3. Connect the created bootable drive to the new computer and reboot the computer by pressing and holding F2/Del to enter the BIOS. Then, set the WinPE bootable drive as the boot disk and press F10 to exit.
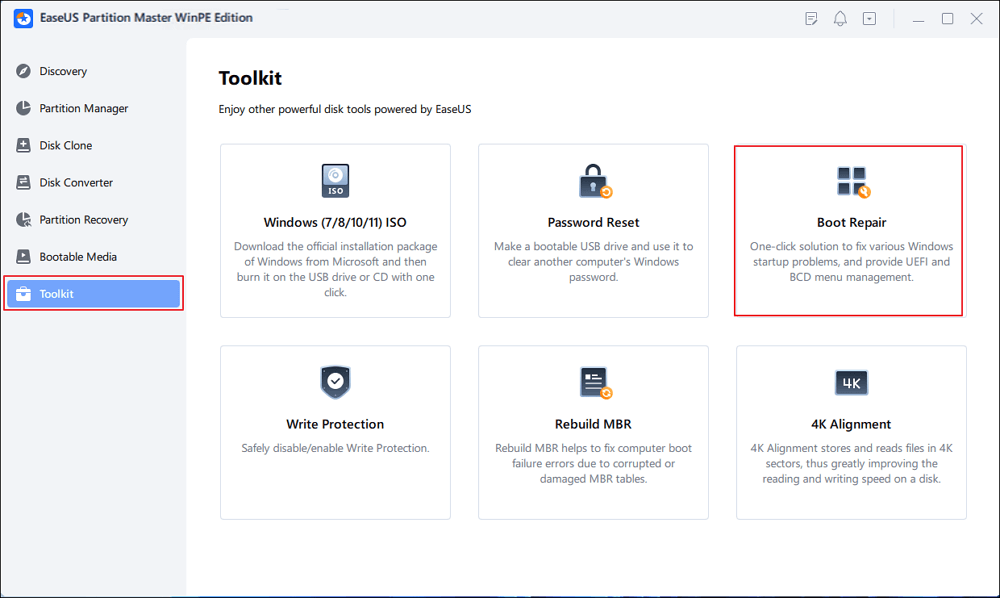
Step 4. Boot the computer again and enter the WinPE interface. Then, open EaseUS Partition Master and click "Boot Repair" under the "Toolkit" option.
Step 5: Select the system you want to repair and click "Repair."
Step 6. A message showing that the system has been successfully repaired will appear. Click "OK" to complete.
After the process, set the computer to boot from the original drive. Then, restart your Windows 11 and enter passwords if you have. Your computer should be able to work as usual now.
If there are any issues with the MBR, the OS will not load and the computer will be unbootable. MBR error 1, MBR error 2, or MBR error 3 could all be the error. All of them indicate that the master boot record has been corrupted or failed.
You can use Bootrec.exe in the Windows RE to troubleshoot startup issues. In the following contents, you'll learn to rebuild MBR step by step.
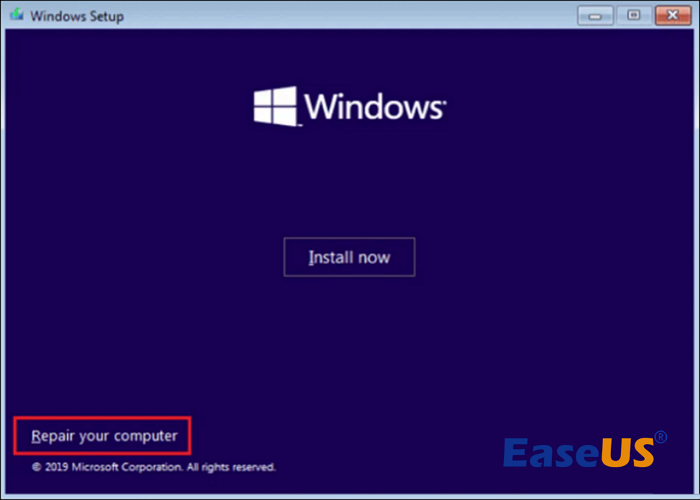
Step 1. Connect Windows 11 installation disk/USB to your PC. Restart and boot from the disk/USB. Then click "Repair your computer".
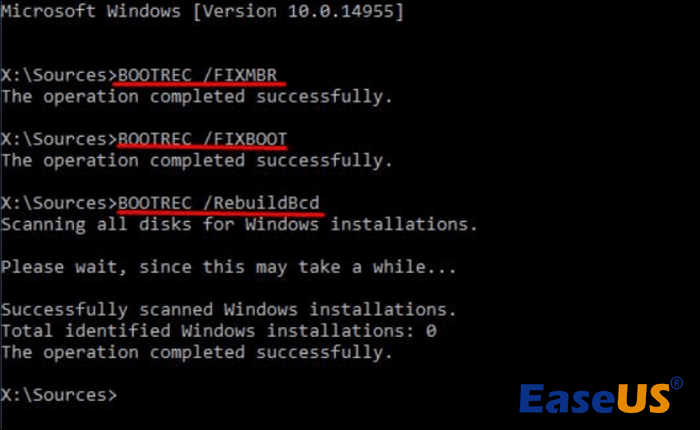
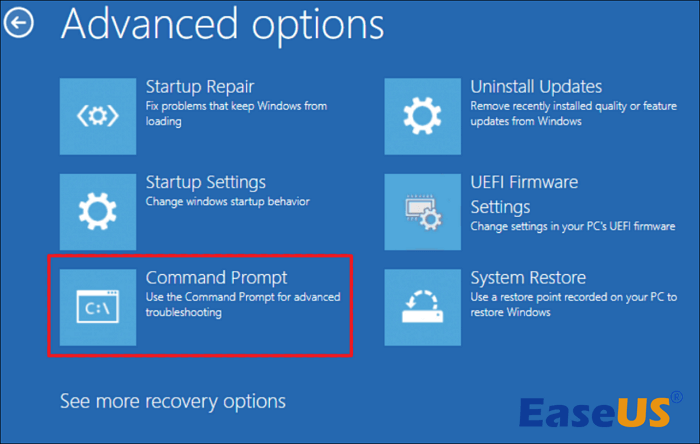
Step 2. Select "Troubleshoot > Advanced options > Command Prompt".
Step 3. Type in the 3 commands below and press "Enter" after each command:
Now, restart your computer and see if Windows 11 boots properly.
Another possibility is that your PC is attempting to load Windows 11 from an external device and is unable to reboot since nothing is there. Disconnect the external drives to see whether it is the cause of the problem.
If the boot mode is not compatible with your disk type, it may cause the Windows 11 startup problem. An MBR system disk should be booted under Legacy support, while a GPT system should be matched with UEFI. You can try the steps outlined below to see if they resolve BIOS misconfiguration issues.
Step 1. Press a certain key like F1, F2, F10, Esc, or Delete (depending on your manufacturer) on your keyboard while booting up your PC.
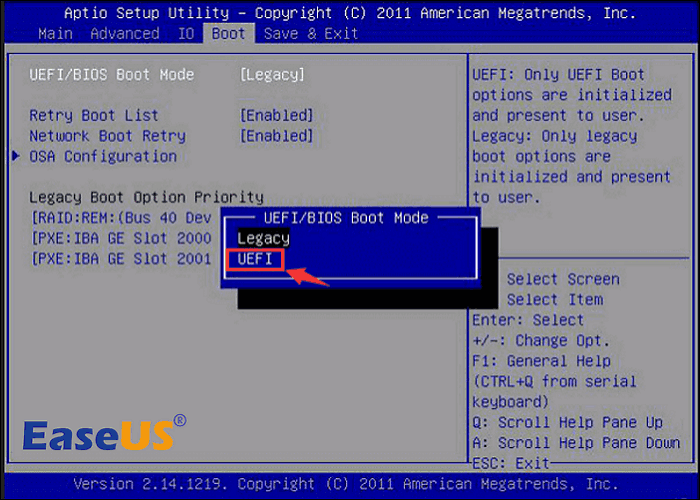
Step 2. Use the arrow keys and move to the "Boot" page.
Step 3: Modify the "UEFI/BIOS Boot Mode" based on your disk partition style, and press "Enter".
Step 4. Navigate to the "Save & Exit" page and press "Enter".
Reboot your computer and check if you can access the system.
Even if your computer won't boot, CHKDSK can check for bad sectors. It is the damaged part of your hard disk. The tool scans the hard drive for corrupted files and can repair and clean up your computer.
Step 1. Press "F11" when your computer is booting up to access the Windows Recovery Environment.
Step 2. Navigate to "Troubleshoot > Advanced options > Command Prompt".
Step 3. Type chkdsk C:/f in the command line, and you'll be informed that Chkdsk cannot start because the volume is being used by other tasks. Do you want to check this volume when the system boots next time?
If you press Y, Windows 11 will save all lost data in the root directory in a file called Filennnn.chk. After Chkdsk has completed, you can examine these files to see if they contain any data you want.
If you press N, Windows will repair the disk. However, lost allocated units will not be saved.
Corrupted or damaged system files can cause your Windows 11 to be unable to start up. The System File Checker (SFC) Scan command is able to detect and modify system files and settings, then it can replace those files with the cached version of them. Now, follow the guide below.
Step 1. Get in the Advanced Startup by turning on your PC and tapping "F11".
Step 2. Select "Troubleshoot > Advanced options > Command Prompt".
Step 3. Type in the command below and press "Enter".
sfc /scannow /offbootdir=c:\ /offwindir=c:\windows
After this, reboot your PC to see if it works.
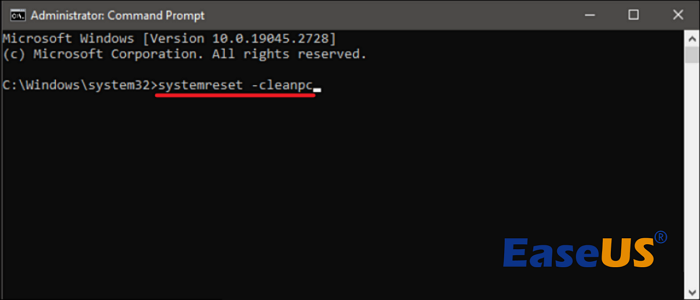
If none of the methods above fix your Windows 11 booting problem, you can try resetting your PC to the original settings or reinstalling the Windows 11 system.
Step 1. Go to the Windows Recovery Environment. Press "F11" when your computer is booting up.
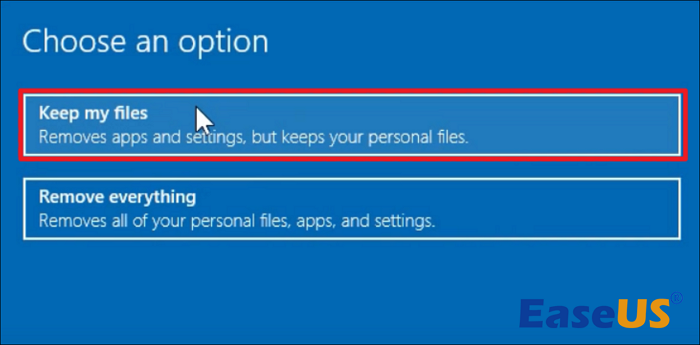
Step 2. Click "Troubleshoot > Reset this PC".
Step 3. Select "keep my files". Then, follow the instructions to complete resetting your Windows 11 PC.
This method should resolve your problem. Restart the computer and check if it's true.
When significant changes to the system are detected, the System Restore feature will create a snapshot of the present working state and save it as a "restore point". If a serious problem happens after installing an update, driver, or mistakenly adjusting system settings in the Registry, you can reset the device to a previous restore point to repair the issue without losing your files.
Follow the steps below to perform a system restore when Windows 11 fails to boot:
Step 1. To enter WinRE, restart your computer several times when you see the Windows logo or boot it from an installation USB/disc.
Step 2. Navigate to "Troubleshoot > Advanced options > System Restore".
Step 3. When the System Restore widget appears, click "Next".
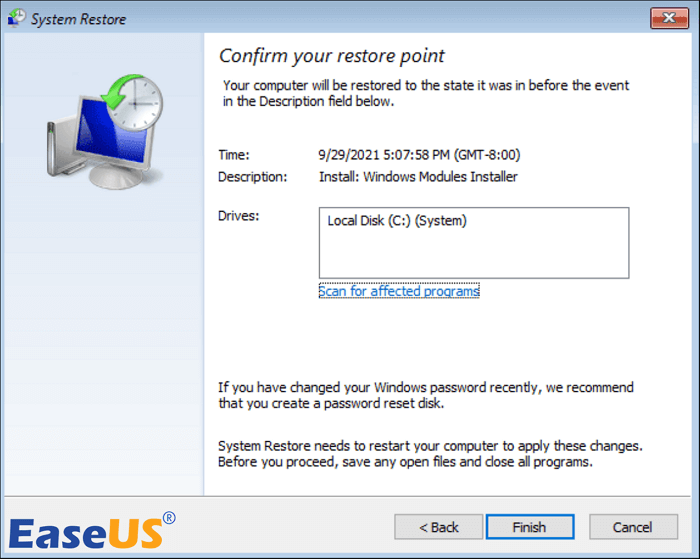
Step 4. You can see the restore points that you created in the pop-up window. Then, select the most recently created one and click "Next".
Step 5. You will be asked to confirm the restore point. Then, click "Finish" to begin the restoration process.
After the process, your system will be back to the earlier version, and the computer should be able to boot up.
The latest quality update or feature update can both be the reason why your Windows 11 is unbootable. For this, you need to troubleshoot problems updating Windows. Some users have fixed their computers successfully after they have uninstalled the latest update. You can try it with the following guide.
Step 1. Press "F11" after you power up the PC.
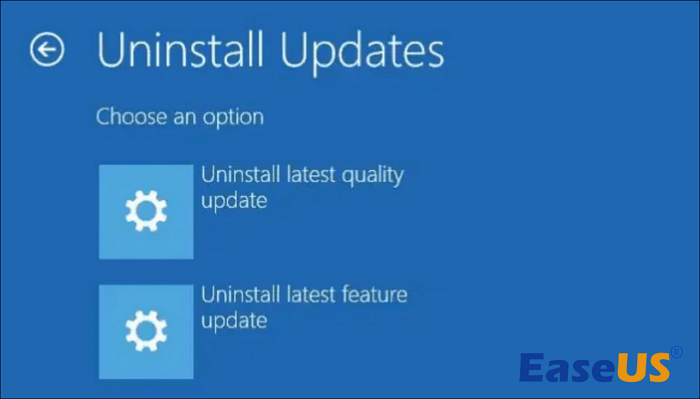
Step 2. Select "Troubleshoot > Advanced options > Uninstall Updates".
Step 3. Choose "Uninstall latest quality update" first. Then, restart the computer to check if it works.
Step 4. Choose "Uninstall latest feature update" if Step 3 fails.
If this method works, congratulations. If not, move to the next one.
Drivers that are outdated or invalid may make Windows 11 unbootable. Uninstall the new driver version if your computer fails to boot after a recent driver update.
Step 1. Press "F11" when booting up to access the Windows Recovery Environment.
Step 2. Navigate to "Troubleshoot > Advanced options > Command Prompt".
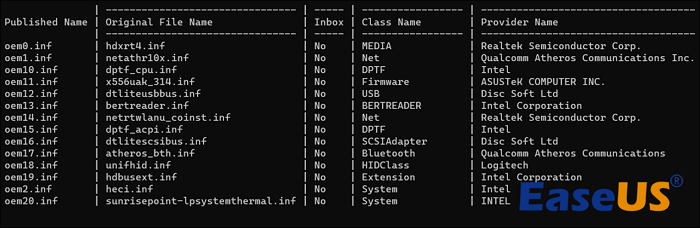
Step 3. Type Dism /online /Get-Drivers / all /Format:Table and press "Enter". A list of drivers installed on your PC will show up.
Step 4. Note the Published Name of the driver you want to uninstall.
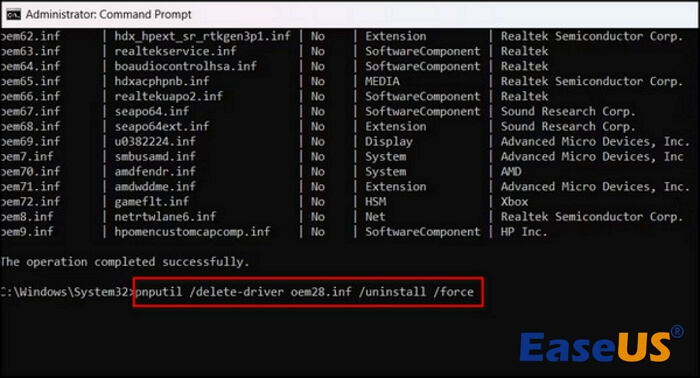
Step 5. Type pnputil /delete-driver <Published Name> /uninstall /force in the command line. Replace <Published Name> with the name you just noted down. Then, press "Enter".
Finally, restart your computer and see if you can boot into Windows 11 successfully.
If you find the computer unable to boot up after upgrading from an HDD to a SSD, the SATA mode of your computer might haven't been changed. Check the BIOS configuration and ensure the system boot for AHCI.
Step 1. Tap "F11" while your computer booting up. You will get into the Advanced Startup screen.
Step 2. Select "Troubleshoot > Advanced options > Command Prompt".
Step 3. Type in bcdedit /set {current} safeboot minimal (ALT: bcdedit /set safeboot minimal), and press "Enter".
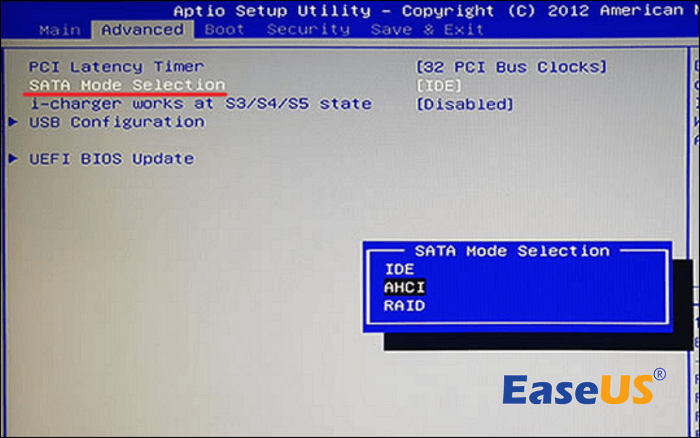
Step 4. Restart your PC and press certain key(s) to enter BIOS Setup. (Search it online to locate the correct key or keys for your computer.)
Step 5. Change the SATA Mode from RAID/IDE to AHCI.
Step 6. Save the changes and exit. Your computer will boot to Safe Mode automatically.
Step 7. Right-click "Start" and run Command Prompt as administrator.
Step 8. Type bcdedit /deletevalue {current} safeboot (ALT: bcdedit /deletevalue safeboot), and press "Enter".
Step 9. Restart again. Your Windows 11 will start with AHCI drivers enabled automatically.
(If the cloned system is set to RAID mode, add the appropriate RAID driver.)
When UEFI is faulty or corrupted, it impacts the bootloader and causes it to fail. The Windows OS cannot reboot normally due to a corrupted UEFI or an invalid bootloader. Try this way to solve the problem.
Step 1. Enter the Command prompt from Advanced options.
Step 2. Type in diskpart in Command Prompt and hit "Enter".
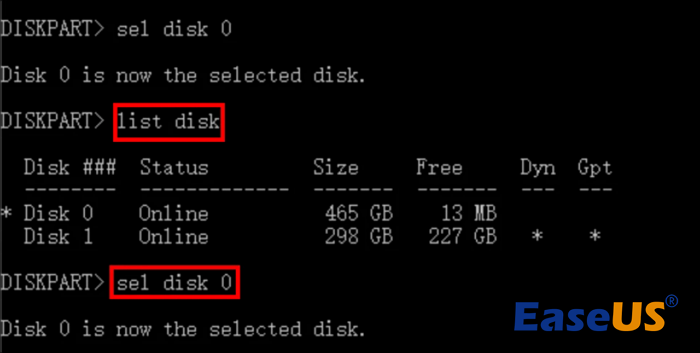
Step 3. Type list disk and hit "Enter".
Step 4. Type sel disk 0 and hit "Enter" to select disk 0.
Step 5. Type in list vol and hit "Enter" when you see the message "Disk 0 is now the selected disk".
Step 6. Find the UEFI volume from the displayed list (usually Volume 2).
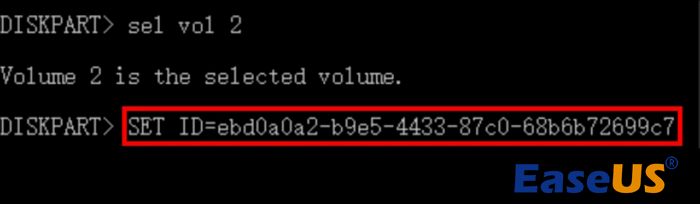
Step 7. Type sel vol 2 and hit "Enter" to select the UEFI volume.
Step 8. Type set id=c12a7328-f81f-11d2-ba4b-00a0c93ec93b or SET ID=ebd0a0a2-b9e5-4433-87c0-68b6b72699c7 and then hit "Enter" to set the volume ID.
Step 9. Type assign letter=G: to assign a drive letter to the partition. (G should be a letter that has not already been used.)
Step 10. Run Command Prompt as an administrator, and then type cd /d G:\EFI\Microsoft\Boot (G is the drive letter you assigned to the UEFI partition. Replace it with your UEFI partition letter).
Step 11. Type bootrec /fixboot and hit "Enter" to repair the boot record.
Step 12. After the repair process is complete, type exit.
Step 13. Type ren BCD BCD.old and bcdboot C:\Windows /1 en-us /s G: /f ALL to rebuild the BCD store. (c:\ is the drive where your Windows 11 is installed).
Step 14. Type exit when the process is complete, and then restart your computer.
Your UEFI boot should now be fixed. Restart your PC and see if you can boot into Windows 11.
The fact that Windows 11 is unable to boot up has many complex causes. There are multiple solutions as well. You can fix the problem by rebuilding BCD, rebuilding MBR, resetting the PC, executing a system restore, etc. One of them can definitely be your best Windows 11 boot repair method.
Yes, there is a built-in tool called the Windows Startup Repair tool. You can use it to run SFC and DISM scans, perform a system restore, and reset your PC.